The Bucket Book
  • Home
  • About
  • Video
  • Blog
  • Workshops
  • Resources

Home Bucket Drumming for Beginners: Five Teaching Tips

4/21/2020

5 Comments

 
Hello music teachers and parents and students!

I've created a short, online bucket drumming course for your students to use while we're all distance learning/teaching due to Covid-19. The goal is to get your students making music and have some fun while doing it.

The curriculum is hands-off for teachers and hands-on for students and includes some 'greatest hits' from my 15 years of teaching bucket drumming to students ages 8 to adult. It's all road - tested and ready to go; these are all activities I've used with countless students between grades 3 and adult. I've included a lot of play-along/backing tracks in the videos so students get the feel for playing with musicians. Many of the videos even have a Jam Session with my musician buddies who are stuck at home. 

Honestly, just send these videos to your students and they'll do all the work for you. I even include pdfs notating some of the material in the lessons if you'd like your students to read.

Here is the playlist containing all the videos (with more on the way!)
The course runs itself: just have the students get a bucket and sticks and play along with the videos. But here are some ideas to increase student engagement and interaction.

1. Embed or Paste Links for students

Post individual videos to Seesaw, Google Classroom, Schoology, Veracross, or whatever learning management system your school uses. Or post the entire playlist and have students work at their own pace. 

2. Require Exit Tickets

Picture
Give students a chance to prove that they are learning by providing prompts for your students to respond to. They could respond with a comment on your LMS, or better yet audio or video. My favorite option is have students post performance videos on Flipgrid. If you haven't used Flipgrid before, it's awesome. It's a site where your students can share videos with you and other students in your class and students respond with videos of their own. It's worth your time to check out.

Here are some prompts you might use:
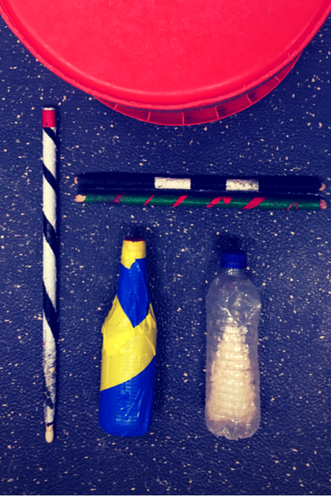
  • Lesson 1 - Submit a selfie of you with your bucket and sticks
  • Lesson 2 - Submit a video of you playing "8 on a hand"
  • Lesson 3 - Submit a video of you playing one of the grooves
  • Lesson 4 - Submit a video of you playing along with a song of your choosing (school appropriate!)
  • Lesson 5 - Submit a video of you playing the bucket song
  • Lesson 6 - Submit a video of you teaching how to do one of the things you’ve learned to a family member OR submit a video of a groove or unison that you composed
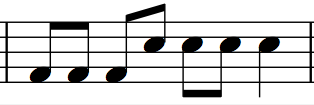
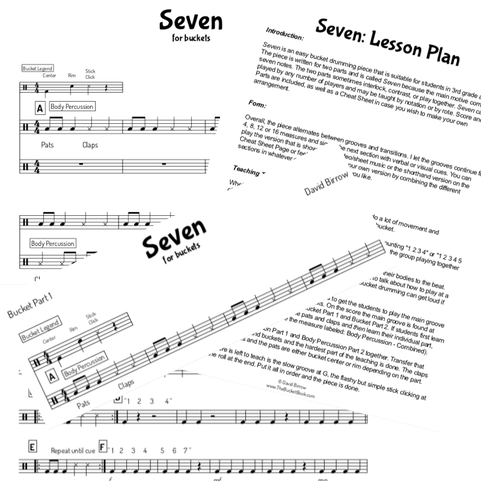
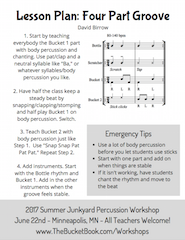
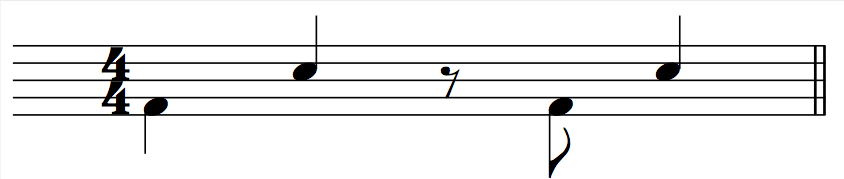
  • ANY Lesson - Have students perform from the included pdf sheet music 

3. Have Students Do It More Than Once

Think of each video like a workout or better yet: a rehearsal for a performance. Students should play through each video several times to build their skill level.

​You could set a requirement such as: "Play with this video three times between now and next week." I've tried to keep the videos on the shorter side (2-10 minutes) so students would be more apt to repeat. them

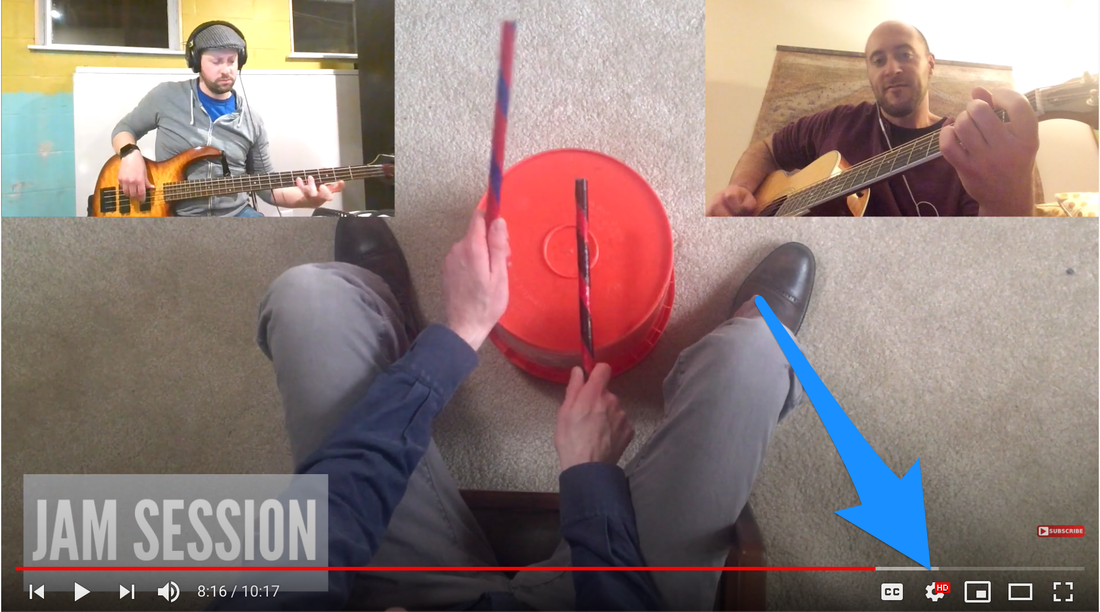
4. Speed Up or Slow Down

Students can speed up or slow down the tempo by clicking on the gear icon on YouTube.

Too easy? Tell them to speed it up Too hard? Slow it down.

​ Just like you would do in an actual rehearsal. 
Picture

5. Have Them Read

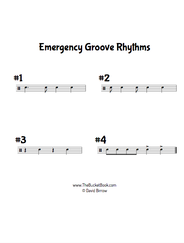
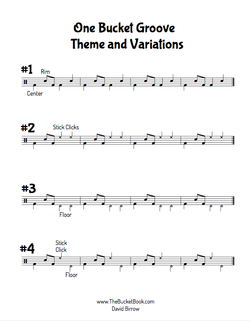
The videos are designed for rote learning AND I've included PDF sheet music for most of the videos. Below are the links:
Picture
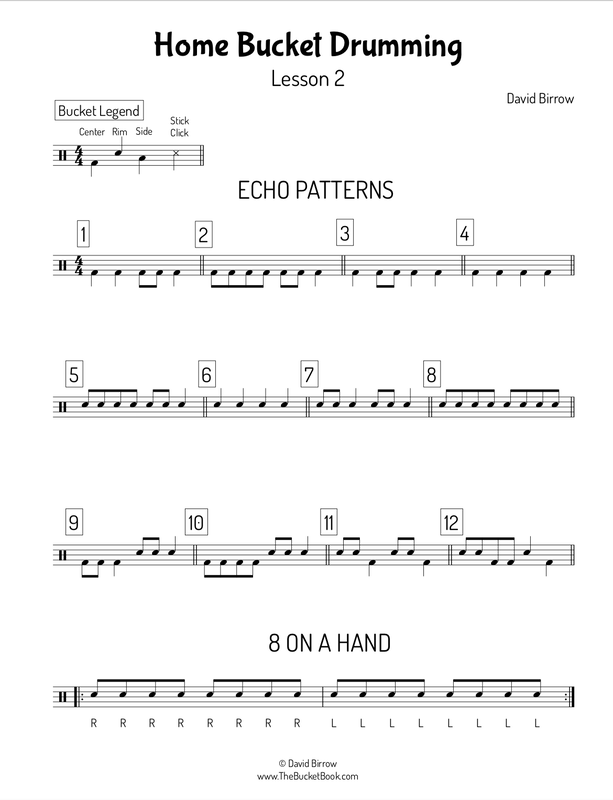
Lesson 2 Sheet Music
Picture
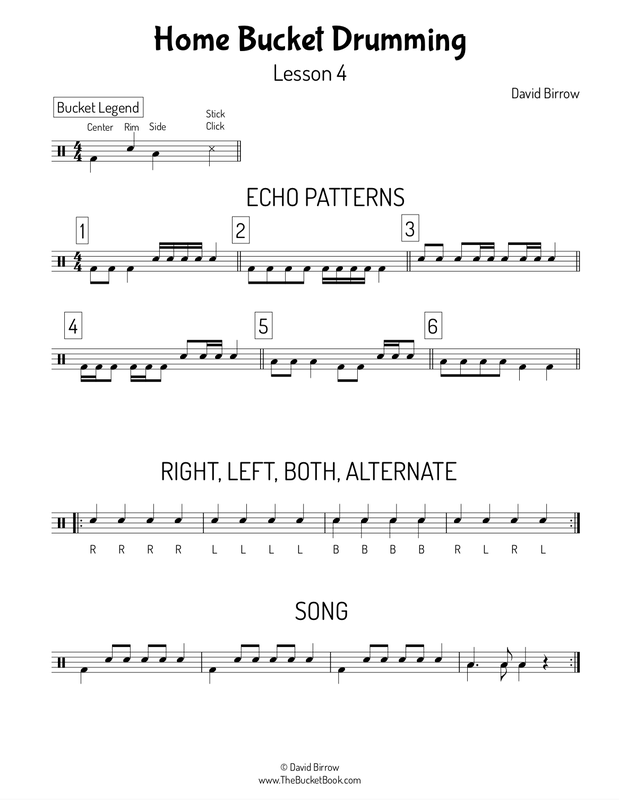
Lesson 4 Sheet Music
Picture
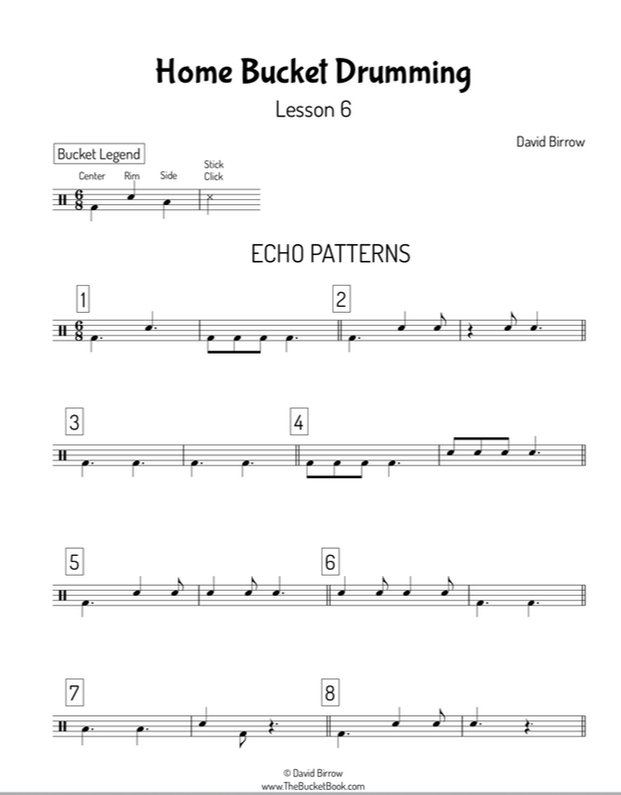
Lesson 6 Sheet Music
Picture
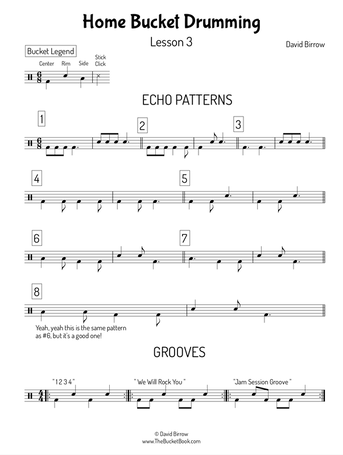
Lesson 3 Sheet Music
Picture
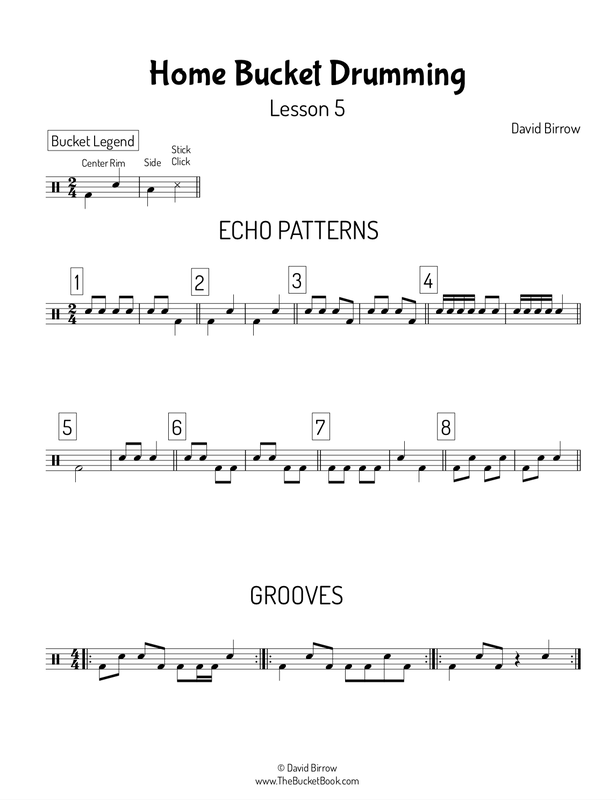
Lesson 5 Sheet Music

Contact me!

Feel free to get in touch with any feedback, ideas, suggestions, or problems (or successes!). Stay tuned for the 15 - Minute Bucket Drumming Challenge, which is a video series for older students. 

TWITTER: @DavidBirrow
EMAIL: David@thebucketbook.com
5 Comments

Online Learning: Bucket Drumming Duet

3/26/2020

7 Comments

 
Well, here we are: distance learning until at least the first week of May. 
​
Maybe this can help: 

I created two videos that teach your students how to play a bucket drumming duet. The duet is called Seven which is a piece I composed last spring. This new duet version has a break down of how to play it and then has students rehearse the piece along with a recording in a virtual duet.


How to use this for distance learning:

Send your students one of the videos and have them learn it. Maybe you could pair students up and after they can play it, have them record themselves and share the video with their partner. They can then play along with their partner's video like an in person duet.

Or take it a step further and challenge students to edit the two videos together to make it look like they are playing together. Maybe edit together an entire class to create a virtual percussion ensemble. Make sure to let me know if you try this!

Recording tip:

​
Tell students to wear headphones when they record and to play along with the video or have them play to a click at 120 bpm. That way all the recordings will be at the same tempo.

Below are the two videos along with a link to the parts and a full score. Let me know how else I can help. I plan on posting a full distance bucket drumming unit in the coming weeks, so stay tuned and subscribe to receive email updates.

And don't forget to cross your fingers: maybe you will even get a chance to rehearse them in person sometime soon. ????????????

Download PDF Part for Player 1
Download PDF Part for Player 2
Download Full Score ​
7 Comments

Seven: an easy bucket drumming piece.

4/22/2019

0 Comments

 
​Seven is an easy bucket drumming piece that is suitable for students in 3rd grade and up. The piece is written for two parts and is called Seven because the main motive comprises seven notes. The two parts sometimes interlock, contrast, or play together.

Seven can be played by any number of players and may be taught by notation or by rote. Score and Parts can be downloaded below, as well as a lesson plan and a Cheat Sheet in case you wish to make your own arrangement. Here is a video of a basic arrangement (don't be fooled by my serious expression, it's a really fun piece!):
How to Teach it:

Whether teaching by notation or rote, I have students do a lot of movement and chanting/counting out loud before they begin to play the bucket.

I typically start by teaching the two transitions with students counting "1 2 3 4" or "1 2 3 4 5 6 7" out loud as they play. This is an easy way to start and gets the group playing together in unison before they have to play separate parts.

Transition 1 (Letter D) is most successful when students move their bodies to the beat.

Transition 2 (Letter F) involves dynamics, so it's convenient to talk about how to play at a musical dynamic by using appropriate stick heights, as bucket drumming can get loud if you're not careful.
Body Percussion GrooveMain Groove Combined
After teaching the transitions, your next goal is to get the students to play the main groove first on body percussion and then with sticks.

On the score, the main groove is found at Letter C and on the Cheat Sheet it is Bucket Part 1 and Bucket Part 2. If students first learn a composite part that contains all the pats and claps and 
then learn their individual part, things tend to go smoother. (See the measure labeled: Body Percussion - Combined). 

Then play Body Percussion Part 1 and Body Percussion Part 2 together. Transfer that experience to sticks and buckets and the hardest part of the teaching is done. The claps become stick clicks and the pats are either bucket center or rim depending on the part.

Then all there is left to teach is the slow groove at G, the flashy but simple stick clicking at H, and the roll at the end. Put it all in order and the piece is done.

Click on the image below to download!

Seven Download
Click on the image to download
Some other useful posts:
  • Ultimate List of Volume Hacks for Bucket Drumming
  • Let this video teach your students a bucket drumming groove
  • 2019 Summer Junkyard Percussion Workshop (Registration is now open!)
0 Comments

Let this Video Teach Your Students a Bucket Drumming Groove (Video/Lesson Plan/mp3)

4/26/2017

0 Comments

 
Ok ok, you'll need to do a little teaching. But that's about all the energy I have left this time of year: a little. You can tell it's spring because the students start acting a little more wild, a little shorter on attention span...a little more squirrely. Add in concerts and grading and it's amazing any of us are still standing.

So you might be in the market for a lesson plan that works in just a single period and one you can use with multiple grade levels. And maybe one where you don't have to sweat too hard.

Maybe this groove can help...Below you'll find a lesson plan, play along track, video and song suggestions.

Here is how I'd teach it:

4-Part GrooveClick to Download Printable PDF Lesson Plan
  • 1. Start by teaching everybody the Bucket 1 part with body percussion and chanting. I'd use pat/clap and a neutral syllable like "Ba," but use whatever syllables/body percussion you like. If you feel unsure teaching this, check out this post. 

​2. Have half the class keep a steady beat by snapping/clapping/stomping and half play Bucket 1 on body percussion. Switch.

​
3. Teach Bucket 2 with body percussion just like Step 1.  Perhaps use "Snap Snap Pat Pat Pat." Repeat Step 2.

4. Add instruments. Start with the Bottle rhythm and Bucket 1. Add in the other instruments when the groove feels stable. Click here to download the full lesson plan (PDF).

But wait, there's more!

PDF Lesson PlanClick to Download
Turn on the video and have the students play along by watching their part on the screen and playing along. This is great because it's sometimes difficult to model more than one part at a time.

Next, turn on this play along track and have students play along. Download it here (don't forget to download the printable Lesson Plan too!)​

Then find some tunes and have the students play along with the music. They'll love it and offer a bunch of song suggestions. Once you 'safety check' their suggestions, turn on the song and play along.

​The tunes in the video include:
  • We Found Love - Rihanna and Calvin Harris
  • Hey Boy Hey Girl - Chemical Brothers
  • Outside - Ellie Goulding and Calvin Harris
All are at 128 bpm, but this groove works at slow, medium, and fast tempo. Here are some other suggestions:
  • I Feel Good - James Brown (kind of quick, but fun)
  • Happy - Pharrell 
  • Oye Como Va - Santana version
To learn more, be sure to check out the Summer Junkyard Percussion Workshop. In 2017, it will be held on June 22nd from 9:00-4:00 pm in Minneapolis, MN. Lesson plans, process, repertoire and more are all covered in a fun, hands-on way. And delicious food! There is more information on the Workshops page. Happy drumming!

0 Comments

Bizarre Junkyard Percussion Composition Ideas for the Final days of School (Part 3 of 3)

6/2/2015

1 Comment

 
For those of you still in the classroom: this one is for you.

This time of year, I never know what will grab my students attention. I'll show up with 4 or 5 backup activities in my back pocket, just in case my main lesson plan goes out the window during the first 60 seconds.

Below are a handful of emergency, last ditch activities that focus on student composition. But first, here is the basic composition outline I use in class:
bucket drum and shakers and sticks
Basic Composition Activity Outline
GOAL: Students compose a 30 second piece of music in small groups. 
  1. Teacher gives students some parameters to focus their work (more on that below).
  2. Students spend some time composing
  3. Students perform for the class

I consider Junkyard Percussion to include any item which you can't buy in a music store. So if you want to use buckets this week, great. But maybe your patience is thin, or you just don't want to deal with possibly loud volume in the final weeks of the school year. 

Instead, why not find some super non-traditional items to make music with and then use the Basic Outline found above?

Read More
1 Comment

Part 2: How Junkyard Percussion Can Save Your Sanity in the Month of May.

5/27/2015

0 Comments

 
bucket drum
Last week's bucket drumming lesson plan worked because it reduced the content down to one single rhythm. 

This week we take it one step further and eliminate all teacher created rhythms. Instead, we ask the students to provide the rhythm content and the teacher simply provides the structure and shape. 

Here is how it works...

Junkyard Percussion Circle Activity
  1. Students are seated (or standing) in a circle and each student has a junkyard percussion instrument. 
  2. Pick one student and ask them to play a rhythm pattern on their instrument and keep playing it. Go easy on yourself and start with a student whom you know will play something steady. 
  3. Ask the student next to them to add a different rhythm on their instrument. Proceed all the way around the circle until everybody is playing. 

Now it's your job to take this simple activity and make it musical. While students are playing:
  • Solo certain instruments by yelling "Shaker solo!" or something like that
  • Sculpt the piece by changing the dynamic with hand gestures
  • Play a fake endings where you stop everybody and then start again 4 beats later
  • Add accents by clapping; students play the accent when you clap 
Shaping and sculpting the music is essential, otherwise it just turns into a thunk-fest. I list a bunch of different ensemble shaping ideas in Chapter 3 of The Bucket Book.

Here is what our class sounded like last week:
Emergency Supplies:

Some students may not feel comfortable providing their own rhythms. No Problem. Model one of these simple but groove-guaranteed rhythms. 

You can also give students the option to either copy the rhythm of the student before them or create something new. This gives students an out if they can't think of an interesting rhythm.
Junkyard Percussion Emergency Groove Rhythms
Click to Download
Ideas to lengthen student attention span:
  • Rotate instruments every 30 seconds so kids can play different instruments. Just say, "pass your instrument to the right."
  • Start over but have students add just one note (or two notes or whatever)
  • Change the meter to triple or even 5/8 or 7/8 

Why will it work during the final months?

Student based compositions are always a good idea, but they are especially useful during the final weeks of school since you don't have to convince students to play a certain rhythm. Students are always motivated to play rhythms that they naturally play well or simply have an affinity for. 

Also this activity is student centered, with students making meaningful choices. Those two things will help to keep your blood pressure low during the last weeks of school.

Good luck and don't forget to subscribe to the The Bucket Book blog to receive email updates with more lesson plan ideas!
Subscribe to The Bucket Book Blog
0 Comments

How Junkyard Percussion Can Save Your Sanity During the Month of May (Part 1 of 3)

5/20/2015

3 Comments

 
Summer is coming. I can feel it. And so can the students...
How Junkyard Percussion Can Save Your Sanity
Soon, so soon...
During the month of May, my lesson planning sometimes comes up short and other times the tail end of a unit simply gets destroyed by the warm weather, field trips, and squirrelly student behavior that only seem to happen in May. Long term objectives can take a back seat for a couple classes during May in the interest of keeping things sane and keeping the kids engaged in making music.

The activities in these next few posts work really well in May and June since they don't require any week to week development and require minimal convincing/explaining/begging with students.
Teach this Piece: One Bucket Groove - Theme and Variations
This activity uses one rhythm in four different ways. Teach the first groove that uses just the rim and center of the bucket. Then proceed to the other variations. Feel free to download the sheet music and project it on the board for your students (or yourself!). 

Watch the video below while following the music but don't get overwhelmed; You don't need to learn all the variations or play them one after another. Just teach the variations that you can easily play confidently. 
Bucket Drumming Theme and Variations
Click to Download
Another idea is to only teach the first groove and then have students come up with their own variations. If an Admin walks in the room, explain that you are teaching a "Theme and Variations" lesson with student composition. Smile and give yourself a high five for being awesome in the month of May.  
Why will it work during the final months? 

It only uses one rhythm pattern which:
  • simplifies student focus
  • reduces the number of things students have to attend to at once
  • reduces the number of things the teacher has to attend to 

Learn other survival skills at the Summer Junkyard Percussion Workshop. An all-day professional development workshop that shows you everything you need to teach bucket drumming. 
Subscribe to The Bucket Book Blog
3 Comments

Chaotic but Awesome Movement Activity

3/21/2015

0 Comments

 
Here is one of my favorite bucket movement inventions from the past few years:
The best part about this thing is that I have no idea how it was created because the students figured it out on their own. The steps that led up to it's creation were pretty simple: I showed the students a basic movement groove(Click here for video), how to slide the buckets, and I explained the safety rules involved (no buckets getting thrown over other students etc...) Then I just told them to take 10 minutes and compose something. Anything.  

Then the students did what all middle school students tend to do with an open ended idea: they took it to the next level. In other words, they composed something far more fascinating than I ever could AND they were into it because it was their idea. 

But even more than that, the students rehearsed themselves. This isn't a positive because I'm a lazy teacher, it's a positive because students tend to communicate with each other far more effectively than a teacher can. 

Even if I wanted to rehearse this piece myself, I couldn't. The students were the insiders who contained all the experience and information on how this thing worked. Just now, 2 years later, it took some effort for me to even figure out how to explain it.

The diagram of this piece looks like this:
Picture
Picture
Picture

The thing that kills me is how simple the rhythm is:


And yet the end musical result is complex and the performers have an exciting and engaging time. The students even figured out a contingency plan for what happens when there is a bucket collision: chuck your bucket in the middle. Piece over. 

Give your students some experience moving buckets. Feel free to try some of the ideas from these videos(Click Here). Then try giving your students an open ended composition assignment and see what happens. If we get out of the way of our students, they sometimes create music far above their current achievement level.   

Happy chaos!

0 Comments

Composing for Random Instruments Lesson Plan

12/6/2014

0 Comments

 
Metal percussion instruments
Most of the time I stick to the core group of instruments when teaching bucket drumming. But sometimes I'll mix it up and have the students compose music with a completely different set of instruments. 

Tossing a pile of bizarre instruments in front of students and asking them to compose is an appropriate challenge. Students must closely listen to the timbre of each instrument and then make effective compositional decisions based on what they hear. In other words, students have to use their musical skill set in an unfamiliar context. That's a good thing for a lot of reasons.

The metal collection shown was put together at a thrift store for about $30. It includes tin cans, frying pans, pipes, a wok, the broiler pan for a toaster oven, a trash can lid, and a tissue box cover amongst other things. There is also a commercial shaker, ribbon crasher, and African gankogui bell, but you don't have invest in those percussion instruments, I just happened to already have them lying around. 

How To Teach It
Random Instrument Composition (15-20 minutes) Note: once students get the hang of this procedure it only takes 5-10 minutes. We often use this format to generate new ideas when we get stumped on what to play next. 

Objectives:
By the end of this activity, students will be able to:
  1. Compose and perform a 3 person groove on metal instruments
  2. Explain the reasoning behind their musical decisions (usually about rhythm and timbre)
Assessment: Students perform for the class, then answer questions from other students. 
Procedure:
  1. Teacher tells students: "It's your job to create a groove that sounds musical. Each person must play a different instrument and a different rhythm. That means it can't be random noise; It must have a steady beat and be organized in some way."
  2. Students select instruments and split into groups of 3 (2 is too boring, 4 makes group dynamics too complicated)
  3. Students get 3 minutes to work on rhythms using body percussion. No instruments yet. This keeps volume down. 
  4. Students then transition to experimenting and composing with instruments for 3 minutes. 
  5. Teacher tells students: "You have 3 minute to rehearse your piece. Make sure you know how to start the groove." (If this gets too noisy, have one or two groups use instruments and everybody else use body percussion again. Then rotate who gets to use instruments.)
  6. Students then take turns performing for the class.

When I first started teaching composition like this, I felt like it was chaos and that I was abdicating control of my class. I also felt like I should be giving super rigid instructions for composition. But giving away some power actually makes students more productive and increases motivation. If students get stumped, they'll come back with questions like "How are we supposed to do this?!" and "are we doing this right?" Which is great since you can respond "on demand" to students and answer specific questions. This is much more effective than me lecturing on "how to compose" at the beginning of the lesson.

Also keep in mind you'll hear a lot of grooves that are offbeat, disorganized, or just plain boring. In The Bucket Book I explain how to avoid unmusical results and how to teach students to thoughtfully organize their compositions.

You can extend this lesson by combining the individual student grooves into a massive groove. This doesn't always work, but when it does, it's very cool. Below is an example:

0 Comments

First Lesson Redux

11/19/2014

0 Comments

 
One Bucket GrooveToday's One Bucket Groove
Today I started the bucket drumming unit at New City School for grades 4/5. Reality is almost always different than theory, so I thought I'd post what I actually did for this lesson plan compared to what I might have written in The Bucket Book. 

23 Students, 7 buckets, enough sticks for every student. 
  1. Intro: I performed a bit to hook the students
  2. How to Hold Sticks
  3. Stick Mirror
  4. Echo patterns on floor and legs
  5. Floor Leg Chair (we sit on the carpet, so I changed it to: Floor, Leg, Air)
  6. Unison #4
  7. One Bucket Groove (see below)

This took 35 minutes of class time. We also covered resting, relaxed, and ready position. Placing the sticks on the carpet is a good relaxed position while sitting on the floor. I don't often spend an entire class period on buckets, but this was the introductory class, so I wanted to budget enough time for teaching routines such as holding sticks and resting position. 

The rationale for only 7 buckets for 23 kids is mainly volume and classroom management. I teach in the student's homeroom classroom (so not a music room) and it's pretty loud acoustically. Fewer buckets = less noise. We made 7 buckets work by sitting in a circle and rotating the buckets around every 30 seconds or so. It also controls off task behavior because students don't have a bucket right in front of them to distract them. And yeah, it's easier for the teacher to haul them in and out of the classroom. Always a plus!

0 Comments
<<Previous

    Author

    I'm David Birrow. I teach and play percussion. This blog is a companion to The Bucket Book. Contact me at : David@TheBucketBook.com or learn more about me at: www.DavidBirrow.com

    Subscribe

    Buy The Bucket Book:

    Categories

    All
    Distance Learning
    Getting Started
    Lesson Plans
    Logistics
    Movement
    Professional Development
    Repertoire
    Volume Control