| Just because you don't have your own music room, doesn't mean you can't teach bucket drumming to your students. I’ve taught general music almost exclusively on a cart for the past 8 years and as a result teach in a very lean and practical way. Here are some tips from the road... 1. Reduce You don't need to have a bucket for every student. In fact, I usually teach with a student to bucket ratio of 2:1. Keeps the volume down, increases instruction opportunities, and lightens my load. | 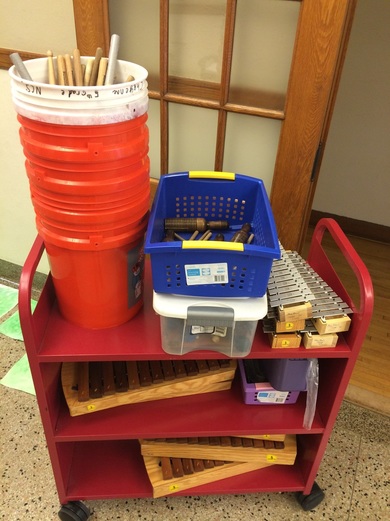 My home on wheels |
2. Diversify
Your next question might be: “Won’t students get bored or off task if they don’t have a bucket?” They might, so give them another, more portable, instrument to play when they don't have a bucket. Such as: a scratcher, shaker, glass bottle(copiously wrapped in duct tape). But having them play nothing for a short period of time is a good teaching technique as well.
The key is to stagger the placement of instruments. Take a look at the diagram below (an adaptation of a Jim Solomon idea.
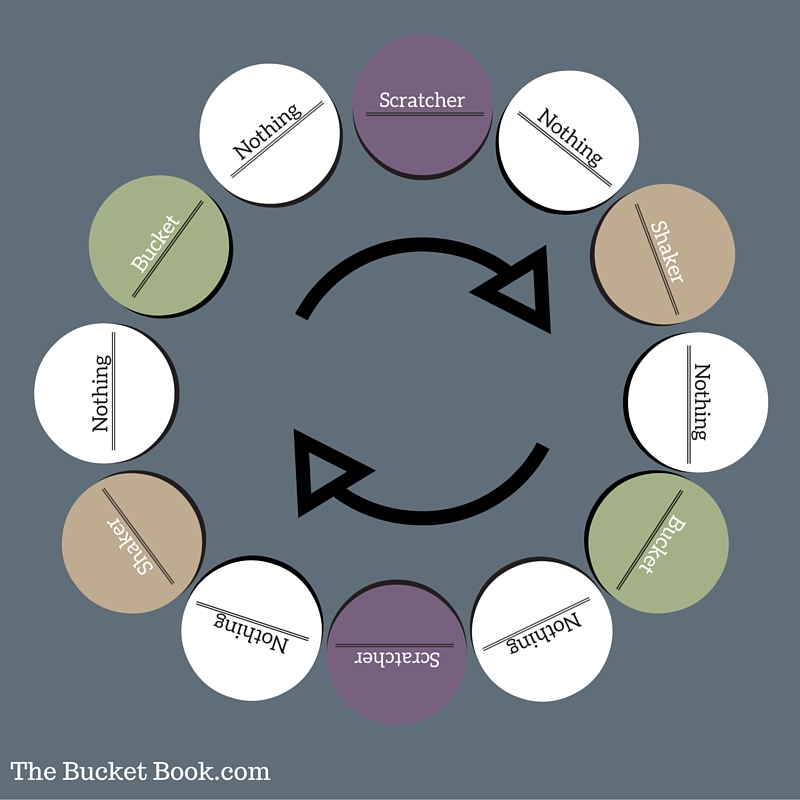
Get everybody in a circle and hand out instruments in this order: Scratcher, Nothing, Shaker, Nothing, Bucket, Nothing. Students in the “nothing” position use body percussion to practice the rhythm of the instrument that is on their right.
After 30 seconds or so, rotate either the instruments (clockwise) or the students (counter-clockwise). The student who was just practicing with body percussion gets the instrument and has already practiced the rhythm. Boredom avoided and practiced increased!
After 30 seconds or so, rotate either the instruments (clockwise) or the students (counter-clockwise). The student who was just practicing with body percussion gets the instrument and has already practiced the rhythm. Boredom avoided and practiced increased!
3. Nest Your Instruments
Place shakers inside of scratchers; scratchers inside of buckets; and sticks in the bucket. Super compact!
Place shakers inside of scratchers; scratchers inside of buckets; and sticks in the bucket. Super compact!
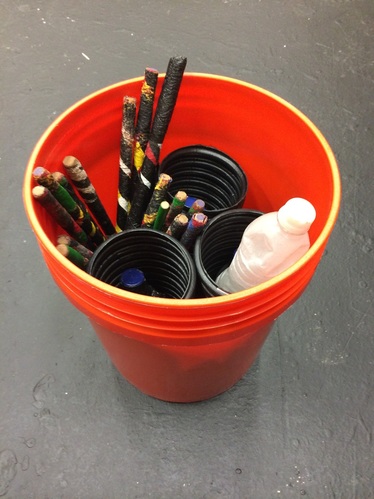
Enough instruments for 8 students
4. Create a Bucket Stash
If you absolutely need more than 5 or 6 buckets, store a stack of extras in a friendly teacher's room or a strategically placed closet. This way, if you have 5 on your cart, and store 5 extras, then you have 10 buckets at your disposal. You can usually convince the teacher by explaining it's only a short term loan. Label the stack: "Buckets for Music Class" so they are not moved/trashed or used for custodial purposes.
5. Use a Decent Cart
Ok I know, this seems obvious, but a poorly designed cart will doom you before you even get rolling. The red cart shown above works very well since all four wheels turn, which helps navigate tight classrooms or hallways. The three large shelves holds all the things I need for multiple grades and are easy to load/unload. If you are thinking about using a cart exclusively for hauling large percussion of any sort (tubanos, djembes, xylos), you might consider the Rock N Roller series of carts. I use them for gigs and they are flexible and hold a large amount of gear.
Happy Rolling!
